The Unsharp Mask filter part 3: High radius, low amount sharpening
A different way
This article is in the middle of what is becoming a consistent series about sharpening. In this previous article I explained that depending on certain image characteristics, a larger or smaller sharpening radius is preferable. The more fine detail, the smaller the radius; the more noise, the larger the radius – that's about what it came down to.
There exists a rather different way of sharpening. So different that it's questionable whether the term "sharpening" should be applied. It doesn't sharpen edges, but it does increase local contrast. And it can be accomplished by the same Unsharp Mask filter that we use for "real" sharpening.
Let me explain. Look at figure 1 below (figure 2 is a fragment of this original). There are edges that can be sharpened. That's what happens in figure 3. But looking at a wider level, this image has darker and lighter areas. It would be nice to mildly darken the darker areas and mildly lighten the lighter areas, to make everything stand out in its environment. Not as strongly as one would apply small-radius sharpening (that would blow everything out), but just a bit.
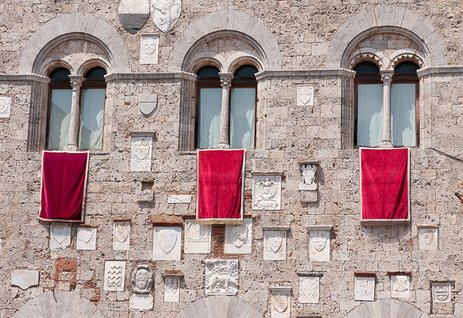
Figure 1. Original image
Monastery
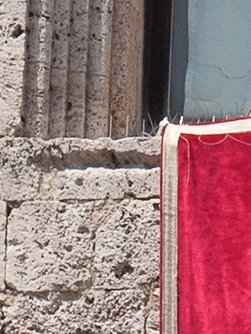
Figure 2. Fragment of original
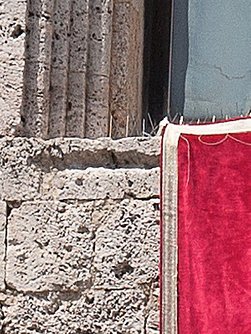
Figure 3. Conventionally sharpened
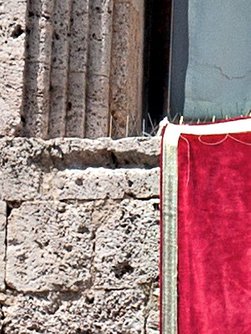
Figure 4. Hiraloam sharpened
Turns out, this is well possible using the very Unsharp Mask filter that we are studying for the third time. The necessary parameters are a high radius (say, more than 20 pixels) and a low amount (say, less than 50%). Figure 4 shows the result of such an application. Some call this "shaping" as opposed to "sharpening", others insist that this is just another case of sharpening. Dan Margulis calls it “hiraloam” sharpening, an abbreviation of High Radius Low Amount. This term has not been widely adopted as far as I know, but it’s fitting nevertheless.
Whatever we call it, it has a beneficial effect on many images. It's worth looking at what happens, from a numbers point of view.
The numbers
The first question we can ask is, how does this differ from a normal Contrast enhancement? Or from an S-curve, for those familiar with Curves? Well, those adjustments are global. How a pixel changes is determined by its original value and the adjustment itself, and nothing else. Start with RGB 200,200,200 – a light grey – increase contrast such that the resulting value is 210,210,210. It follows that every pixel measuring RGB 200,200,200 will make the exact same move by this contrast adjustment.
For the high radius, low amount sharpening, this is not true. (In fact, it's not true for any application of the Unsharp Mask filter.) Hiraloam's actual effect on a pixel depends not just on the starting point, but also on surrounding pixels. Should we start with 200,200,200, the resulting value after an application of the filter could be 210,210,210 only if the surrounding pixels are darker. Another pixel with the same starting point 200,200,200 but surrounded by lighter pixels will get darker instead. Internally, the filter blurs over the given radius and uses the result as reference point to find out how one particular pixel has to move.
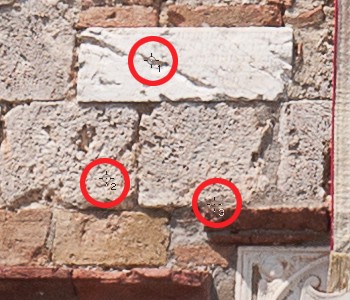
Figure 5. Three pixels sampled, left original, right high-radius low-amount USM applied
Figure 5 shows the effect. I sampled three pixels, not far from each other. Number one (top) is on the edge of a crack in the middle of a white marble stone. Number two (bottom left) is on a more weathered and darker-looking brick. Number three (bottom right) is close to a small ridge that casts a dark shadow below it.
In the original, each of these three points measures L 68 in Photoshop LAB color. In other words: they have equal luminance. Their colors are slightly different, but each is somewhere between a light brown and pinkish beige.
On the full image, I applied the Unsharp Mask filter with the following values: Radius 30, Amount 35%, Threshold 0. What happens?
- Sample pixel 1 gets darkened to L 63. Why? Because it’s in the middle of a very light area.
- Sample pixel 2 keeps the same L value. It’s surrounded by both darker and lighter pixels.
- Sample pixel 3, bordering on many dark pixels, gets lightened to L 71.
To show the wonderful effect of this way of sharpening, compare the example area (figure 6) with the result of a simple S-curve (figure 7). One only needs to look at the marble stones and the ruby red carpet to get convinced. Our three sample pixels each measure L 72 after the curve application.
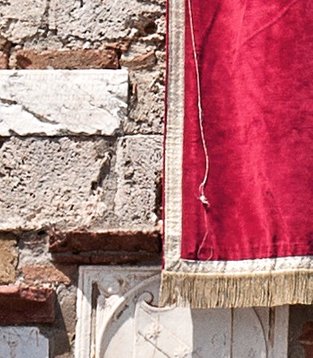
Figure 6. Hiraloam applied
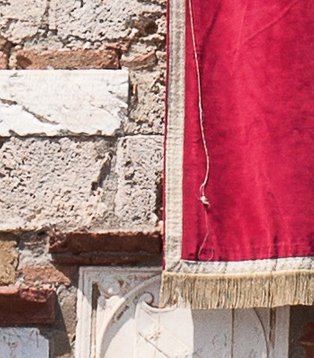
Figure 7. S-curve applied
To the limits
What happens when we increase Radius to a very large number? The largest that Photoshop allows is 1000. So why not try that? I did – and look at what it brings (figure 8). With a bit of imagination one could say that it’s somewhere between figures 6 and 7. Between the result of a smaller-radius sharpen and one of an S-curve application.
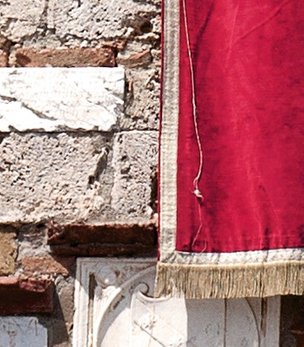
Figure 8. Hiraloam with radius 1000
Think about it, and it makes sense. The small radius sharpen increases contrast within an area of the given radius. The S-curve also increases contrast, but without taking context into account. Or stated differently, it uses an infinite radius. All pixels are compared to some grand average to determine if they should be darkened or lightened. That’s just about the definition of an S-curve, with the "grand average" at the center of the curve.
A 1000-pixel radius approaches an infinite radius. Pixels are compared, not exactly to everything else, but to a very large image area. It may be that such a very large area is mostly dark or light, in which case the filter behaves differently from a global adjustment and more like a small radius sharpen. But a large radius always catches a wider variety of luminance values than a small one. Hence, the larger the USM radius, the more “global” the effect will be, the more it resembles a contrast curve.
Of halos and color shifts
Something to be very careful of when applying a hiraloam sharpening is that it can cause halos. Most likely along the edges of featureless image areas. The most common occurrence? You guessed it: blue skies. See figure 9 for an example.
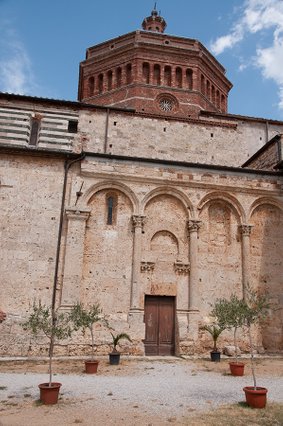

Figure 9. Left: original. Right: hiraloam sharpened.
Note the halo around the top of the building.
The remedy? A manual procedure or an action like I introduced in this article may help. Instead of working with the Unblurred layer as in that explanation, here a copy of the unsharpened layer could serve as a starting point.
An alternative for those who work with Photoshop CC is to apply the Camera Raw filter and invoke the Clarity slider from there. Not the same, but similar. And a good suppression of halos.
Another pitfall of hiraloam is the same as what happens in conventional sharpening: It can cause unwanted color shifts. It is therefore recommendable to apply the filter on a separate layer set to blend mode Luminosity. Or…?
In the PPW Sharpen action, a layer called Hiraloam Color is created. This is the color part of a hiraloam sharpening. The assumption behind this is that the color shift gives a beneficial effect of moving neighboring colors slightly apart. This very layer, plus two other hiraloam layers, will be subject of study in my next article.
Gerald Bakker, 17 Feb. 2018
Related articles
Photoshop by the Numbers
